-
Python: Kafka + 대학교 공지 Parser + Slack API + MySQL컴퓨터/파이썬 2020. 12. 15. 15:00728x90반응형
결과물
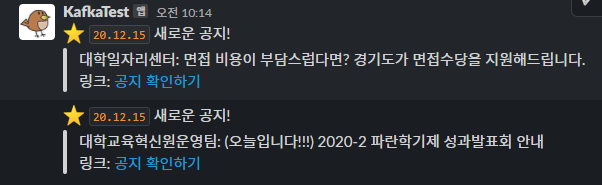
Slack 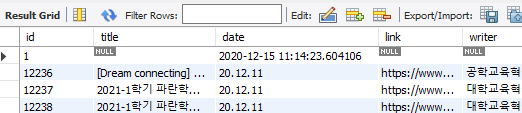
MySQL 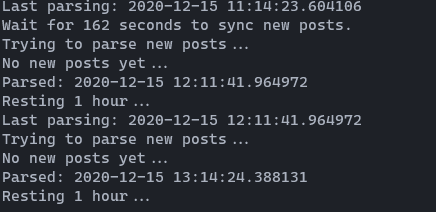
Apache Kafka 1. 만들 것
사실, 하나의 파일로, parsing 하고, slack api에 전달하고, mySQL이나 json으로 저장해도 되지만
(Kafka Connect Sink로 해도 되고 방법은 많다.)
공부해본 것을 사용하기 위해,
짬뽕- Apache Kafka Producer에서 대학교 공지 데이터 불러오기
- MySQL로 공지 저장과 동시에 Consumer로 데이터 전달하기
- Apache Kafka Consumer에서 Slack API를 이용하여 댓글 남기기
(카카오톡 챗봇이 수락이 되면 카카오톡 챗봇으로 업데이트 예정)
(서버 부담을 덜기 위해, 1시간 간격으로 공지 파싱)
2. 준비물
Apache Kafka
Apache Kafka
Apache Kafka: A Distributed Streaming Platform.
kafka.apache.org
분산 스트리밍 플랫폼, 서버 용도
(Apache Kafka 소개: @링크)
MySQL
MySQL
Over 2000 ISVs, OEMs, and VARs rely on MySQL as their products' embedded database to make their applications, hardware and appliances more competitive, bring them to market faster, and lower their cost of goods sold. Learn More »
www.mysql.com
데이터베이스 용도
(MySQL 파이썬 소개: @링크)
Slack API
Slack API 이용
Slack은 여러분의 팀과 소통할 새로운 방법입니다. 이메일보다 빠르고, 더 조직적이며, 훨씬 안전합니다.
slack.com
공지 알림 용도
(Slack API 파이썬 사용법 소개: @링크)
3. 파이썬
pytest, unittest로 테스트를 만든 후 코딩 해보길 권장
공지 Parser (예제: 아주대학교)
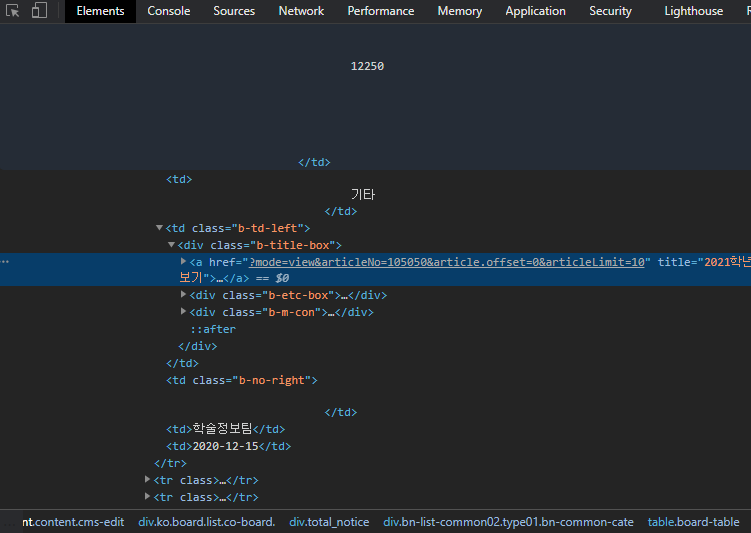
크롬에서 F12을 눌러 원하는 데이터를 클릭 후, 아래 HTML css를 본다.
robots.txt 확인 후 데이터를 파싱 한다, 주기를 길게 두어 서버에 과부하를 주지 않게 한다.방법은 많지만, 게시물 10개로 limit을 걸어, 10개를 배열에 맞게 집어넣는다.
같은 글 id, title, link, date, writer는 똑같은 index를 갖는다.
import ssl

from urllib.request import urlopen


ADDRESS = "https://www.ajou.ac.kr/kr/ajou/notice.do"
LENGTH = 10


def parser():
    # req = requests.get(f"{ADDRESS}?mode=list&&articleLimit={LENGTH}&article.offset=0")
    context = ssl._create_unverified_context()
    result = urlopen(
        f"{ADDRESS}?mode=list&&articleLimit={LENGTH}&article.offset=0", context=context
    )
    soup = BeautifulSoup(html, "html.parser")
    ids = soup.select("table > tbody > tr > td.b-num-box")
    posts = soup.select("table > tbody > tr > td.b-td-left > div > a")
    dates = soup.select("table > tbody > tr > td.b-td-left > div > div > span.b-date")
    writers = soup.select(
        "table > tbody > tr > td.b-td-left > div > div.b-m-con > span.b-writer"
    )
    return ids, posts, dates, writers


# pytest
def test_parse():
    ids, posts, dates, writers = parser()
    assert len(ids) == 10, f"Check your parser: {ids}"
    assert len(posts) == 10, f"Check your parser: {posts}"
    assert len(dates) == 10, f"Check your parser: {dates}"
    assert len(writers) == 10, f"Check your parser: {writers}"
    for i in range(LENGTH):
        postTitle = posts[i].text.strip()  # 공지 제목
        postId = ids[i].text.strip()  # 공지 ID
        postLink = posts[i].get("href")  # 공지 링크
        postDate = dates[i].text.strip()  # 공지 날짜
        postWriter = writers[i].text  # 공지 글쓴이

        assert int(postId) > 10000, f"postId is None."
        assert postLink is not None, f"postLink is None."
        assert postTitle is not None, f"postTitle is None."
        assert postDate is not None, f"postDate is None."
        assert postWriter is not None, f"postWriter is None."

        data = makeJson(postId, postTitle, postDate, postLink, postWriter)
        temp = json.dumps(data[postId])

        print("data", json.loads(temp))
데이터베이스 구조
(실행할 때마다 중복된 공지 전달을 방지하기 위함)
id는 primary key, not null (공지 번호)
title (공지 제목), date (공지 날짜), link (공지 링크), writer (공지 글쓴이)

MySQL Workbench 파이썬으로 데이터 베이스 전달은 아래와 같다.
INSERT_COMMAND = (
    "INSERT INTO notices (id, title, date, link, writer) " "VALUES (%s, %s, %s, %s, %s)"
)  # mysql connector은 pyformat을 사용한다, int도 %s

dbData = (
    int(postId),
    postTitle,
    postDate,
    ADDRESS + postLink,
    postWriter,
)

cursor.execute(INSERT_COMMAND, dbData)  # db insert
db.commit()  # save
Apache Kafka 토픽 생성
broker는 local 머신이기 때문에, 복제 계수 = 1, 파티션 = 3으로 설정
zookeeper-server-start config/zookeeper.properties

kafka-server-start config/server.properties

kafka-topics --zookeeper localhost:2181 --topic AJOU-NOTICES --create --partitions 3 --replication-factor 1
Apache Kafka 서버
(공지가 올라오면, Slack API로 전달하기 위함)
Windows Terminal 소개 글 : @링크
Zookeeper 실행 -> Kafka 서버 실행 -> Producer 및 Consumer python으로 실행
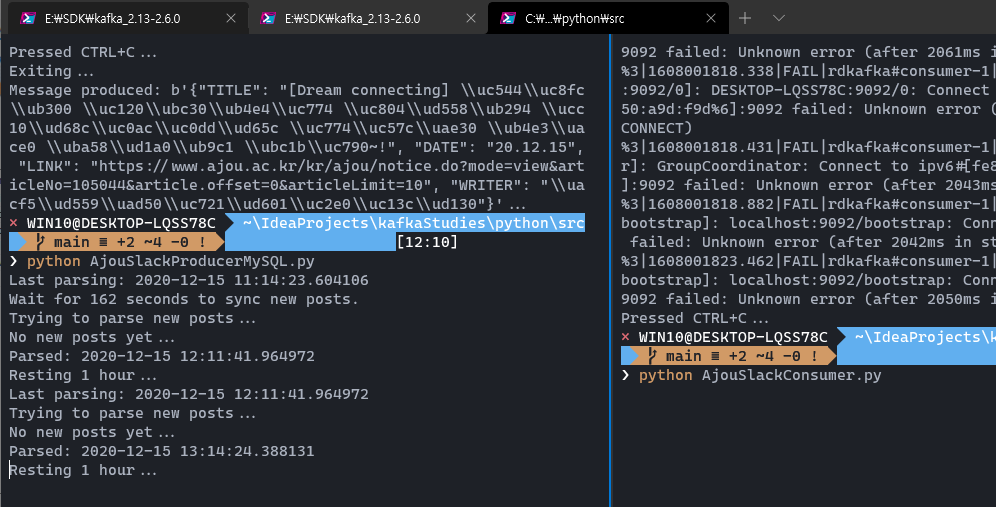
ALT + SHIFT + "+" 키를 통해 창을 나눌 수 있음 Apache Kafka 데이터 형식
kafka Producer는 아래처럼 JSON 형식으로 데이터를 보낼 것이다.
"POSTS": {
        "12186": {
            "TITLE": "[\ud559\uc2b5\ubc95] \uc131\uacf5\ud558\ub294 \ud559\uc2b5\ub9ac\ub354\ub97c \uc704\ud55c \ud559\uc2b5\ub9ac\ub354\uc6cc\ud06c\uc20d \uc548\ub0b4",
            "DATE": "20.12.07",
            "LINK": "https://www.ajou.ac.kr/kr/ajou/notice.do?mode=view&articleNo=104863&article.offset=0&articleLimit=10",
            "WRITER": "\uad50\uc218\ud559\uc2b5\uac1c\ubc1c\uc13c\ud130"
        },
    }
# 단순 dictionary로 변형 def makeData(postId, postTitle, postDate, postLink, postWriter): return { postId: { "TITLE": postTitle, "DATE": postDate, "LINK": postLink, "WRITER": postWriter, } } kafkaData = makeData( postId, postTitle, postDate, ADDRESS + postLink, postWriter )MySQL 대학교 공지 저장, 중복 확인
pytest로 코딩한 부분이다.
import os
from contextlib import contextmanager

import mysql.connector
import requests
from bs4 import BeautifulSoup


# Parsing 주소
ADDRESS = "https://www.ajou.ac.kr/kr/ajou/notice.do"
LENGTH = 10

# MySQL query 명령어
INSERT_COMMAND = (
    "INSERT INTO notices (id, title, date, link, writer) " "VALUES (%s, %s, %s, %s, %s)"
)
DUPLICATE_COMMAND = "SELECT EXISTS(SELECT * FROM notices WHERE id = %(id)s)"
UPDATE_COMMAND = "UPDATE notices SET date = %(date)s WHERE id = 1"


@contextmanager
def OPEN_DB():  # with OPEN_DB() as cursor 사용하기 위함
    # connect to my local MySQL instance using connection string
    db = mysql.connector.connect(
        host="localhost",
        user=os.environ["MYSQL_USER"],
        password=os.environ["MYSQL_PASSWORD"],
        database="ajou_notices",
        charset="utf8",
    )
    cursor = db.cursor(buffered=True)
    yield cursor
    db.commit()  # always commits
    cursor.close()
    db.close()


# Update MySQL database
def updateDB(cursor):
    ids, posts, dates, writers = parser()  # 다시 파싱
    for i in range(LENGTH):
        postId = int(ids[i].text.strip())

        cursor.execute(DUPLICATE_COMMAND, {"id": postId})  # DB 중복 row 확인
        if cursor.fetchone()[0]:  # (1, )
            continue  # postId 이미 존재함, 넘어가기

        postLink = posts[i].get("href")
        postTitle = posts[i].text.strip()
        postDate = dates[i].text.strip()
        postWriter = writers[i].text

        duplicate = "[" + postWriter + "]"
        if duplicate in postTitle:  # writer: [writer] title
            postTitle = postTitle.replace(duplicate, "").strip()  # -> writer: title

        data = (postId, postTitle, postDate, ADDRESS + postLink, postWriter)

        cursor.execute(INSERT_COMMAND, data)  # db에 저장

# pytest
def test_updateDB():
   with OPEN_DB() as cursor:
       updateDB(cursor)

       cursor.execute(
           "SELECT * FROM notices ORDER BY id"
       )  # query = SELECT * FROM testdb.notices LIMIT 3;

       for row in cursor:
           print(row)  # 모든 row 보기
           assert row is not None
마지막으로 parsing 한 시간 기록

서버를 실행할 때마다 불러오는 것이 아닌, 마지막 parsing 기록을 남겨
1시간 간격으로 parsing 하도록 만든다.
(id = 1, date = datetime.now() 형식으로 해두었다)
# Getting LAST_PARSED from MySQL, where id = 1
now = datetime.datetime.now()
now = now.strftime("%Y-%m-%d %H:%M:%S.%f")

cursor.execute("SELECT date FROM notices WHERE id = 1")

# Set last parsed time to rest 1 hour well
LAST_PARSED = cursor.fetchone()[0]
assert LAST_PARSED is not None, "LAST_PASRED is None."
Apache Kafka Producer 및 Consumer 설정
최대한 safe 하고 high throughput으로 만들려고 노력했다.
# Kafka Producer 만들기  "localhost:9092"
settings = {
    "bootstrap.servers": Config.MY_SERVER,
    # Safe Producer settings
    "enable.idempotence": True,
    "acks": "all",
    "retries": 10000000,
    "max.in.flight": 5,
    "compression.type": "snappy",
    "linger.ms": 5,
}
p = Producer(settings)

# 아래는 Consumer 설정
# Set 'auto.offset.reset': 'smallest' if you want to consume all messages
# from the beginning of the topic
settings = {
    "bootstrap.servers": Config.MY_SERVER,
    "group.id": "ajou-notify",
    "default.topic.config": {"auto.offset.reset": "largest"},
}
c = Consumer(settings)
풀 소스는 Github에 올려둔 버전을 참고
참고
Github Kafka 공부: @링크
Github Kafka Python Producer MySQl 버전: @링크
Github Kafka Python Producer JSON 버전: @링크
Github Kafka Python Consumer: @링크
Github Kafka Python pytest 보기: @링크
728x90'컴퓨터 > 파이썬' 카테고리의 다른 글
Python: Popen 백그라운드 실행 및 로그 읽기 (linux) (0) 2020.12.22 Python rich: Console 출력 색깔, 꾸미기 (0) 2020.12.13 Python: with문 만들어 사용하기 (0) 2020.12.11